Stair Inspection Checklist: Handrails, Risers, Trip Hazards, and Report Language That Holds Up
A stair inspection checklist only helps if it keeps you from writing lazy stair notes.
Most stair defects are not mysterious. The loose handrail is right there. The uneven riser is right there. The worn tread edge, missing guard, low headroom, and bad lighting are all sitting in plain view. What gets inspectors in trouble is not usually failing to see the defect. It is failing to document the exact condition, location, and safety implication while moving quickly through the house.
This stair inspection checklist is built for that reality. It is a field-first sequence for home inspectors who want to move stairs fast, capture the right photos, and write findings that still make sense when the client, agent, or contractor reads the report later.
Note
InterNACHI's stairway inspection guidance and ICC residential stairway provisions both treat handrails, guards, rise/run consistency, and safe geometry as core stair-inspection items. Your report is strongest when it describes the observed condition clearly instead of pretending you performed a full code-compliance review.
The Fast Rule for Stair Notes
For every stair finding, capture four things:
- Exact location
- Condition observed
- Safety or functional implication
- Recommended next step
If your note says only "repair stairs," you are pushing the interpretation work onto everyone else.
If your note says "front interior stairs lacked a secure graspable handrail at the open side, which may increase fall risk during normal use; recommend correction by a qualified contractor," the client immediately understands what matters.
A Field Order That Keeps Stair Inspections Tight
Use the same sequence every time:
- Overall stair type and travel path
- Handrails
- Guards and open sides
- Treads, risers, and nosings
- Landings, headroom, and lighting
- Surface wear, looseness, and trip hazards
That order matters because it keeps the life-safety items from getting buried under cosmetic wear.
1. Start With the Stair Type and the Travel Path
Before you measure or photograph anything, stop and read the stair as a user would.
Ask:
- Is this interior or exterior?
- Is it the main circulation stair or a secondary stair?
- Is there an open side?
- Does the user have a clean path from top to bottom?
- Are there obvious limitations from stored items, rugs, finish damage, or layout?
This is especially important on basement stairs, garage entry stairs, split-level transitions, and exterior stairs that get wet. Those are the places where minor defects combine into real fall risk quickly.
Take one overview photo from the top or bottom showing the full run when possible. That image becomes your context shot for every later defect.
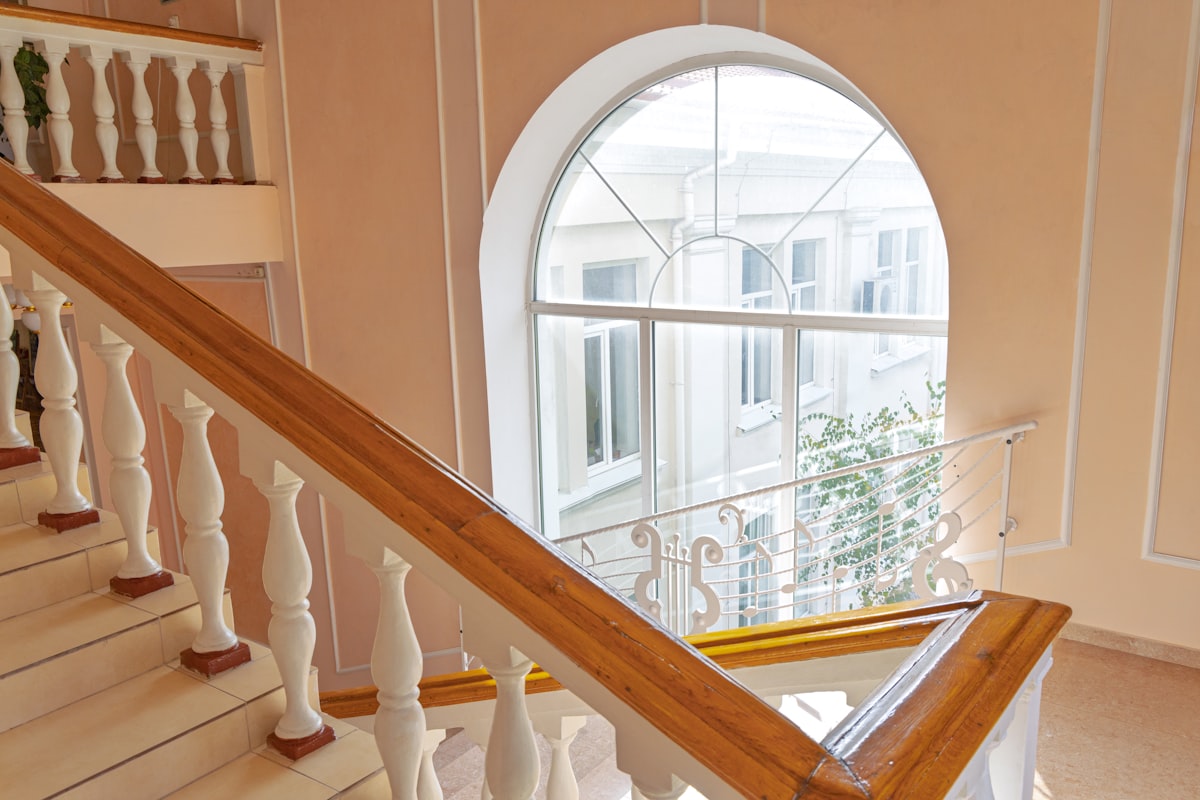
2. Handrails: The First Thing Clients Actually Grab
Most stair injuries are not about theory. They happen when somebody loses balance and reaches for support that is missing, loose, or awkward to grasp.
Check:
- Whether a handrail is present where one is expected
- Whether the rail is continuous over the run where applicable
- Whether it feels secure at brackets and terminations
- Whether the profile appears graspable instead of oversized or decorative-only
- Whether the rail ends in a way that could catch clothing or create an impact point
- Whether paint buildup, damage, or looseness affects use
Do not stop at "handrail present."
A loose handrail is often worse than a missing one from the client's perspective because it creates false confidence. Put a hand on it. Apply normal use pressure. If it moves, say that plainly.
Example narrative: loose handrail
"At the basement stair, the wall-mounted handrail was loose at its bracket connections and moved during normal hand-pressure testing. A loose handrail may not provide reliable support during use and can increase fall risk. Recommend repair by a qualified contractor."
For broader reporting language patterns, see Home Inspection Report Writing: 25 Phrases That Reduce Callbacks.
3. Guards and Open Sides: Fall Protection, Not Decoration
Stairs with open sides deserve their own pause.
You are looking at whether the stair edge and adjacent landing areas have meaningful fall protection and whether the assembly appears secure enough to do its job.
Check:
- Missing guards at open sides
- Loose guard assemblies
- Wide openings between balusters or intermediate members
- Damaged or cut sections
- Wobble at posts or top rails
- Evidence of prior repair that looks improvised or weak
On many homes, the guard problem is not total absence. It is movement. A guard that flexes heavily under moderate pressure is a real finding, even if it looks fine in a listing photo.
If the top of the guard also serves as the handrail, pay attention to whether it actually functions like one. Some wide cap rails look clean but are awkward to grip during a stumble.
4. Treads, Risers, and Nosings: Where Trip Patterns Start
This is where a good stair inspection checklist saves callbacks.
People rarely call you after closing to argue that the rail profile was not ideal. They call because somebody caught a toe on an inconsistent step, slipped on a worn tread edge, or felt unsafe using the stair after move-in.
Check:
- Uneven riser heights
- Uneven tread depths
- Broken, cracked, or soft treads
- Loose treads or movement underfoot
- Missing or damaged nosings
- Worn finish or slick surface conditions
- Carpet damage, detached runners, or edge curl
You do not need to turn every stair into a formal measurement exercise. But if one step is visibly different, feels different, or interrupts the rhythm of travel, it belongs in the report.
Key Takeaway
The strongest photo for an uneven-step finding is often not a close-up. It is an angle shot showing two or three adjacent steps together so the inconsistency reads visually.
Example narrative: inconsistent step geometry
"At the rear exterior stair, step geometry appeared inconsistent, with one riser/tread transition visibly different from adjacent steps. Inconsistent stair geometry can create a trip hazard during normal use. Recommend evaluation and correction by a qualified contractor."
5. Landings, Headroom, and Transition Areas
Some stair defects are not on the stair run itself.
The top landing, bottom landing, and head-clearance area often create the more dangerous surprise points because that is where users change direction, carry items, or assume they are already clear of the hazard.
Check:
- Inadequate or awkward landing area
- Flooring transitions that catch a toe
- Door swing conflicts at the stair
- Low soffits or framing overhead
- Stored items reducing usable clearance
- Loose mats or runners at stair entries
These conditions deserve photos with context. A close-up of a low beam means less than a photo showing its relationship to the stair path.
6. Lighting and Visibility
Stairs can be technically intact and still function poorly if the user cannot see the edge of the treads.
Check:
- Whether the stair is reasonably illuminated at the time of inspection
- Missing or inoperative light fixtures where observed
- Burned-out bulbs if plainly visible
- Deep shadows at top or bottom transitions
- Exterior stairs that may become more hazardous when wet and poorly lit
This is not about guaranteeing every bulb forever. It is about calling out visible conditions that materially affect safe use at the time of inspection.
If operation was limited because lighting was unavailable, say that. Limitation language is better than bluffing.
7. Surface Wear, Movement, and Maintenance Clues
After the main geometry and safety items, look for the wear patterns that show how the stair has actually been performing.
Check:
- Squeaks or movement suggesting loose components
- Split wood at stringers or tread ends
- Rust, corrosion, or failed fasteners at exterior stairs
- Water damage, rot, or softness at exterior landings
- Worn anti-slip surfaces
- Paint or finish wear that may reduce traction
This is where exterior stairs, decks, and porch transitions often overlap. If the stair connects to an elevated deck or porch, pair your note with related structure findings from Deck & Porch Inspection: Complete Field Guide for Inspectors.
What to Photograph Every Time
Minimum stair photo package:
- One overview of the full stair run
- One location photo of the handrail or guard condition
- One close-up of looseness, damage, or missing components
- One angle shot showing uneven treads, risers, or transition issues
- One context shot of landing, headroom, or obstruction issues
- One limitation photo if access or visibility was restricted
If the defect is functional, try to photograph the function problem, not just the component. A hand on a loose rail, a shot showing a rug edge lifting at the landing, or a visible gap at a guard connection is often more useful than a static close-up.
What Gets Stronger Weight in the Report
Put these higher in the report:
- Missing or loose handrails
- Missing or unstable guards at open sides
- Step irregularities that appear likely to trip users
- Significant rot, movement, or structural deterioration
- Low headroom or major transition hazards
- Poor stair conditions at basement or exterior entries where consequences of a fall are higher
Lower-priority notes include cosmetic scuffs, minor finish wear, or small appearance issues that do not materially affect safe use.
The point is not to make every stair note sound dramatic. The point is to distinguish between maintenance and fall-risk conditions.
Language to Avoid
Avoid report language like:
- "Stairs not to code"
- "Unsafe stairway"
- "Needs repair"
- "Recommend upgrade"
Those phrases are too vague or too absolute on their own.
Stronger language sounds like this:
"At the garage entry stair, no graspable handrail was observed along the stair run at the time of inspection. Lack of a usable handrail may increase fall risk during normal use. Recommend installation or correction by a qualified contractor."
Or:
"At the second-floor hall stair, the guard assembly at the open side moved noticeably under normal hand pressure. A loose guard may not provide reliable fall protection. Recommend repair by a qualified contractor."
That wording stays anchored to what you observed.
Ready-to-Use Stair Narratives
Missing handrail
"No functional handrail was observed at the interior stair serving the basement. A missing handrail may increase fall risk during normal use. Recommend installation by a qualified contractor."
Loose guard
"The guard assembly at the open side of the stair/landing was loose and moved during normal hand-pressure testing. The condition may reduce reliable fall protection. Recommend repair by a qualified contractor."
Uneven tread or riser
"One or more stair treads/risers appeared uneven relative to adjacent steps at the time of inspection. Irregular stair geometry can create a trip hazard. Recommend evaluation and correction by a qualified contractor."
Damaged exterior stair
"Visible deterioration and movement were observed at the exterior stair components, including ____ . Deteriorated stair elements may affect safe use and reliable support. Recommend repair or replacement by a qualified contractor."
Why Stair Notes Get Missed
Usually for one of three reasons:
Inspectors walk the house too fast
They visually register the stair but do not physically interact with the rail, guard, and landing transitions.
The photo set is too tight
The report ends up with one close-up of a bracket but no photo showing where on the stair the problem was located.
The note is written later from memory
That is how "loose basement rail at lower third of stair" turns into "repair handrail."
If you want a related life-safety inspection rhythm, our Egress Window Inspection guide uses the same field-first approach: identify the safety function, photograph the sequence, then write only what you actually observed.
Where ReportWalk Fits
Stair findings are exactly the kind of small-but-important conditions that get watered down when you wait until the evening to write the report.
When you document findings with voice instead of typing, you can stand at the stair, describe the exact location, note the loose rail or uneven riser, attach the photo, and move on before the detail gets fuzzy. That is where ReportWalk helps. It keeps the field note specific while the condition is right in front of you, then turns that voice capture into cleaner report language back at the office.
If you inspect enough houses, you already know stairs deserve better than a throwaway note. A good stair inspection checklist gives you the sequence. A voice-first workflow makes it fast enough to use every time.