Fence Inspection: What Every Inspector Should Check & Document
A fence inspection checklist might not be the first thing you think of when you're walking a property, but fences are one of the most common sources of post-inspection complaints. Buyers assume fences are in good shape because they're standing — and then discover the posts are rotted at grade level three months after closing. As inspectors, we need to document fence conditions systematically, the same way we approach any other exterior component.
This guide covers what to check for each fence type, gate functionality, pool fence compliance, property line considerations, and how to write it up so your report protects both the client and you.
Note
While fences are often considered "outside the scope" of a standard home inspection per ASHI Standards of Practice, most clients expect fence commentary. Many inspectors include fence condition in their exterior section as a courtesy — and smart ones document it thoroughly to avoid callback headaches.
Why Fences Matter in a Home Inspection
Fences serve multiple functions: privacy, security, pet containment, pool safety compliance, and property boundary definition. A failing fence can signal:
- Drainage or grading issues (posts rotting at grade contact)
- Soil movement or frost heave (leaning sections, heaved posts)
- Deferred maintenance patterns (if the fence is neglected, what else is?)
- Code compliance gaps (especially pool fencing)
Even if your state's standards of practice don't mandate fence inspection, documenting what you see takes five minutes and can save you from a $5,000 complaint.
Wood Fence Inspection Checklist
Wood fences are the most common type you'll encounter, and they deteriorate faster than any other material. Here's what to check:
Structural Integrity
- Post condition at grade level: This is where wood fences fail first. Probe the base of each post with a screwdriver or awl — soft, punky wood means the post is compromised. Look for discoloration and fungal growth at the soil line.
- Post plumb: Sight down the fence line. Leaning posts indicate either inadequate footing, frost heave, or rot below grade. Note the direction and severity of lean.
- Rail connections: Check where horizontal rails attach to posts. Nails pulling out, split wood at connections, and sagging rails are all common findings.
- Picket/board condition: Look for warping, splitting, missing boards, and boards that have pulled away from rails.
Ground Contact and Moisture
- Grade contact: Fence boards touching soil wick moisture and rot from the bottom up. Best practice is a 2-inch gap between the bottom of fence boards and grade — note when boards are buried in soil or mulch.
- Sprinkler impact: Irrigation heads aimed at fence panels accelerate deterioration. Note sprinkler patterns that regularly wet the fence.
- Vegetation contact: Vines, shrubs, and tree limbs pressing against fencing trap moisture and hide damage. Note where vegetation prevents proper inspection.
Fasteners and Hardware
- Nail pops and rust: Galvanized nails and screws resist corrosion, but cheaper fasteners rust and create streaks on wood. Note visible rust staining.
- Missing fasteners: Boards secured by a single nail instead of two (or none at all) will eventually work loose in wind.
- Bracket condition: Metal post brackets and rail hangers should be corrosion-free and securely attached.
Key Takeaway
When you find one rotted post, probe at least three more. Wood fence failure is rarely isolated — if conditions caused one post to rot, adjacent posts are likely compromised too.
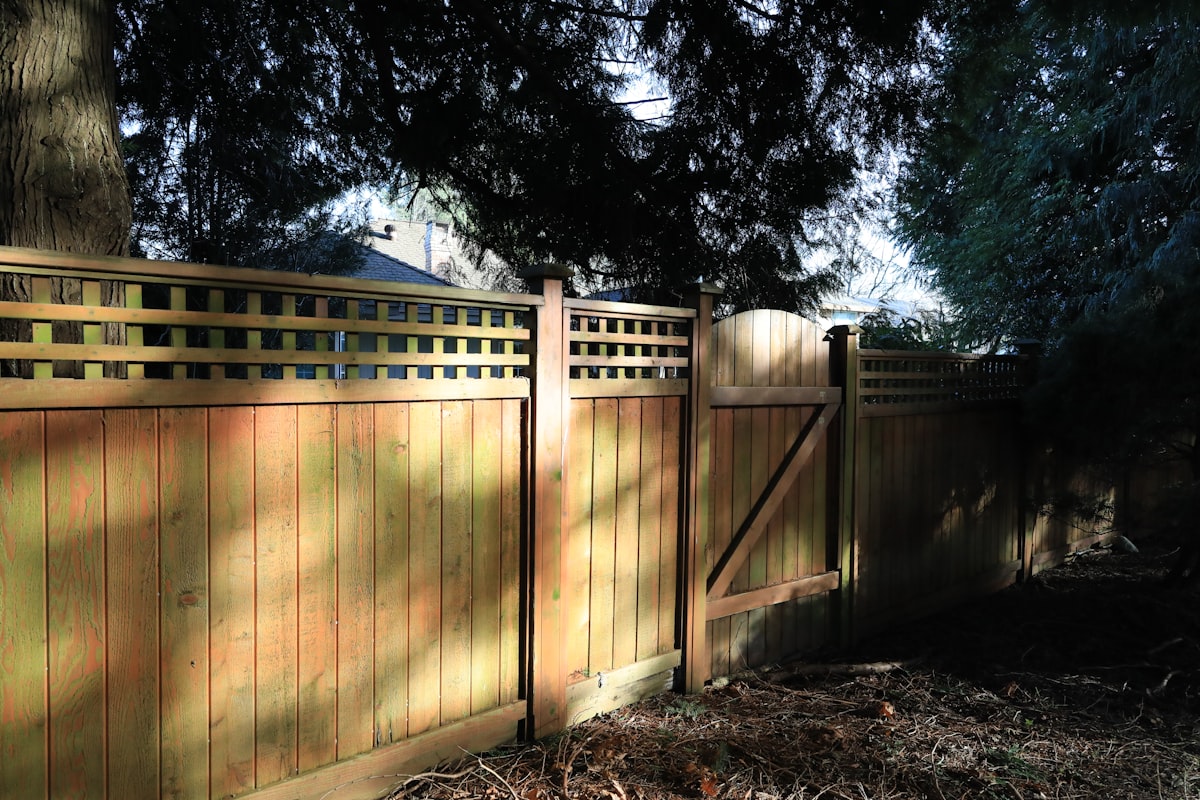
Vinyl Fence Inspection Checklist
Vinyl (PVC) fences are marketed as maintenance-free, but they have their own failure modes.
Common Issues
- UV damage and brittleness: Older vinyl fences become brittle with sun exposure. Tap panels firmly — brittle vinyl sounds hollow and can crack on impact. Note any visible cracking or crazing.
- Loose or disconnected sections: Vinyl panels slot into post channels. Wind, impact, and thermal expansion/contraction can pop panels out of their tracks. Check each panel-to-post connection.
- Post caps: Missing or loose post caps allow water into hollow posts, which freezes and cracks them from the inside out in cold climates.
- Leaning posts: Vinyl posts are hollow and rely entirely on their footing for rigidity. Leaning indicates footing failure — a more expensive repair than wood post replacement.
- Discoloration and staining: Green algae, hard water stains, and mold growth on vinyl panels. Cosmetic, but indicates conditions that may affect adjacent structures.
Gate Condition
Vinyl gates are particularly failure-prone. Check hinge pins, latch alignment, and whether the gate drags on the ground due to hinge sag. Vinyl gate hinges are often plastic and degrade faster than the fence itself.
Chain Link Fence Inspection Checklist
Chain link is the workhorse fence — durable but not immune to problems.
What to Check
- Rust and corrosion: Especially at the bottom where the chain link meets grade. Galvanized chain link resists corrosion initially, but once the zinc coating wears through, rust spreads quickly. Note areas of significant oxidation.
- Fabric tension: Properly tensioned chain link should be taut and difficult to push through. Loose, sagging fabric indicates failed tension bars or bands, or posts that have shifted.
- Top rail condition: Check for bent, rusted, or disconnected top rail sections. The top rail provides structural integrity — without it, the fabric sags.
- Post condition: Terminal posts (corners and ends) and line posts should be plumb and firmly set. Check for rust at the base and concrete footing exposure.
- Ties and bands: The wire ties that attach fabric to posts and rails break over time. Missing ties let the fabric pull away and create gaps.
- Bottom tension wire: If present, check for rust and proper tension. The bottom wire prevents the fabric from being pushed under.
Gate Hardware
Chain link gates get the most abuse. Check:
- Hinge pins and bushings (worn bushings cause gates to drag)
- Latch operation (fork latches should engage smoothly)
- Self-closing mechanisms (especially on pool enclosures)
- Gate frame squareness (sagging frames are common on wider gates)
Wrought Iron Fence Inspection Checklist
True wrought iron is rare in modern construction — most "wrought iron" fences are actually steel or aluminum. Regardless of the material, check:
- Rust and paint condition: Surface rust is cosmetic; deep pitting and scaling indicate structural loss. Pay attention to horizontal surfaces where water pools — top rails, post caps, and decorative scrollwork.
- Weld condition: Check every weld you can see. Cracked or broken welds are both a structural and safety issue (sharp exposed metal).
- Picket security: Push and pull on individual pickets. Loose pickets indicate failed welds or corroded connections.
- Post base condition: Where posts meet concrete or the ground, corrosion is most aggressive. Probe the base with a screwdriver if accessible.
- Paint and coating: Note areas where paint has failed, as these are active corrosion sites. Aluminum fences don't rust but can oxidize and develop a white chalky coating.
Fence Post Footings
Regardless of fence type, post footings determine long-term stability.
What to Check
- Concrete footing presence: For privacy fences and any fence over 4 feet, posts should be set in concrete. Probe the base — posts simply driven into soil will eventually lean.
- Footing depth: In frost-prone areas, footings should extend below the frost line (36–48 inches in northern states). You can't verify depth without excavation, but leaning posts in cold climates strongly suggest inadequate footing depth.
- Concrete crown: The top of the concrete footing should slope away from the post to shed water. Flat or concave tops pool water against the post and accelerate rot in wood or corrosion in metal.
- Heave evidence: Posts that have risen out of the ground or concrete footings that have tilted indicate frost heave — document and note climate implications.
Gate Operation and Hardware
Gates are the highest-maintenance component of any fence system. Check every gate on the property:
- Operation: Open and close each gate. Note dragging, binding, or failure to latch.
- Latch function: Latches should engage and release smoothly. Note child-resistant latches on pool gates.
- Hinge condition: Look for rust, bent hinge pins, loose hinge screws, and hinge sag.
- Self-closing function: Pool gates and security gates should self-close and self-latch. Open the gate to 90 degrees and release — it should close and latch without assistance.
- Clearance: Gates should clear the ground surface (concrete, gravel, grass) without dragging. Seasonal ground heave can change clearance — note current conditions.
Pool Fence Code Compliance
This is where fence inspection shifts from courtesy to critical safety documentation. Pool fence deficiencies are life-safety issues.
Note
Pool barrier requirements vary by jurisdiction, but most local codes align with the International Swimming Pool and Spa Code (ISPSC) or ICC pool barrier standards. Always reference local code for specific requirements.
Minimum Requirements (Most Jurisdictions)
- Height: Minimum 48 inches (some jurisdictions require 60 inches) measured from the exterior finished grade
- Maximum gap at bottom: No more than 2 inches between the bottom of the fence and grade (to prevent children from crawling under)
- Picket spacing: Maximum 4 inches between vertical members (to prevent children from squeezing through)
- Climb resistance: No horizontal rails, decorative elements, or attachments on the exterior that could serve as handholds or footholds. Chain link mesh size must be small enough to prevent toe-holds (2.25-inch diamond opening maximum).
- Self-closing, self-latching gates: All gates in pool barriers must self-close and self-latch from any open position. Latches must be on the pool side, at least 54 inches above grade, or otherwise inaccessible to small children.
- No direct house access without barrier: If the house wall serves as part of the pool barrier, doors opening to the pool area should have alarms or self-closing/self-latching hardware.
What to Document
Note every deficiency clearly. Pool fence gaps, latch failures, and climb-assist features are findings that belong in the report with clear language about safety implications. Reference local code when possible and recommend evaluation by the local building authority if compliance is uncertain.
For a complete pool area inspection approach, see our pool inspection checklist.
Property Line Considerations
Inspectors don't determine property boundaries — that's a surveyor's job. However, you should:
- Note shared fences: Fences on or near property lines may be shared responsibility. Note apparent shared fences without making boundary determinations.
- Encroachment indicators: Fences that appear to extend beyond the subject property, or neighbor fences that appear to encroach, should be noted with a recommendation for survey verification.
- Easement conflicts: Fences built across utility easements may need to be removed. Note fences near transformers, utility boxes, or marked easement areas.
- Disclaimer: Always include language in your report clarifying that property boundary determination is outside the scope of a home inspection.
Retaining Wall vs. Fence Distinction
Don't confuse fences with retaining walls — they have very different structural requirements and failure implications.
- Retaining walls hold back soil and manage grade changes. Failures can cause property damage, drainage issues, and even structural impacts to adjacent buildings.
- Fences sit on top of grade without retaining soil. A leaning fence is a maintenance issue; a failing retaining wall can be a structural emergency.
- Combination structures: Some properties have fences mounted on top of retaining walls. Inspect each component separately and note any interaction between wall movement and fence condition.
For foundation and retaining wall issues, refer clients to a structural engineer when you see significant displacement, bulging, or rotation.
Documentation Best Practices
How to Write Up Fence Findings
- Be specific: "Three fence posts rotted at grade level along south property line" is useful. "Fence needs work" is not.
- Include location: Reference compass directions or property landmarks. "West side fence, approximately 20 feet from northwest corner" gives the client and their contractor a starting point.
- Photograph everything: Photograph overall fence condition, specific deficiencies, and any safety issues. Close-up photos of rot, rust, and failed connections support your written findings.
- Rate severity: Distinguish between cosmetic issues (faded stain, minor algae) and functional/safety concerns (rotted posts, pool fence gaps). Your client needs to know what's urgent.
- Recommend appropriately: Minor issues get maintenance recommendations. Structural failures get contractor evaluation recommendations. Pool fence deficiencies get immediate attention recommendations.
Report Language
Keep your fence section factual and objective. Avoid:
- Estimating repair costs
- Determining fence ownership or property line location
- Declaring code compliance or non-compliance (note conditions and recommend verification)
- Predicting remaining life span
Streamline Your Fence Documentation
Fence inspections add value to your report without adding much time — if you have the right documentation workflow. Walking the fence line takes five minutes. Writing it up shouldn't take twenty.
ReportWalk lets you dictate fence findings as you walk the perimeter — voice-to-text on your iPhone captures observations in real time, and the app organizes them into your exterior inspection section automatically. No scribbling notes, no typing in the truck. Describe what you see, snap your photos, and move on to the next system.
The inspectors who include thorough fence documentation in their reports build a reputation for being detail-oriented — and that reputation is what drives agent referrals and repeat business. Five minutes at the fence line. Zero callbacks about "you didn't mention the fence." That's a trade worth making every time.