Appliance Inspection: What Every Home Inspector Should Check & Document
Every home inspector needs a solid appliance inspection checklist. Appliances are the systems homebuyers interact with every single day, and when something doesn't work — or worse, when it fails a month after closing — the inspector's phone rings first. The good news: appliance inspection follows predictable patterns, and once you've built a systematic approach, you can move through a kitchen and utility area efficiently without missing the items that matter.
This guide covers what to inspect, how to test, what to document, common deficiencies you'll encounter constantly, age and lifespan expectations, and — critically — what's excluded from a standard home inspection per SOP so you don't overextend your scope and create liability.
What's Included in a Standard Appliance Inspection?
Standards of practice from both ASHI and InterNACHI define what's within scope for appliance inspection during a general home inspection. The key principle: you're evaluating permanently installed appliances for basic functionality, not performing detailed mechanical assessments.
Note
Per ASHI Standard of Practice and InterNACHI SOP, home inspectors are required to inspect permanently installed kitchen appliances. Portable or freestanding appliances (countertop microwaves, portable dishwashers, window AC units) are generally excluded unless they're built-in.
Appliances Within Standard Scope
| Appliance | Scope |
|---|---|
| HVAC system (heating & cooling) | Full operational test |
| Dishwasher (built-in) | Run cycle, leak check |
| Range/cooktop | Burner ignition and heat |
| Oven (built-in or range) | Heating element test |
| Built-in microwave | Basic function test |
| Garbage disposal | Operation and drainage |
| Range hood / exhaust fan | Fan operation, venting |
| Refrigerator (if present) | Cooling verification |
| Washer/dryer hookups | Connections and drainage |
| Bathroom exhaust fans | Operation and venting |
Let's break down each one with the specific checks that make the difference between a thorough inspection and a checkbox exercise.
HVAC Units: Heat and Cool Test
HVAC is technically its own system — not just an "appliance" — but it's the most important mechanical system in the house and deserves the first section of any appliance-related checklist. For a comprehensive HVAC deep-dive, see our HVAC inspection checklist.
Heating System Check
- Thermostat operation — Set to heat mode, raise temperature 5°F above ambient. System should engage within 1–2 minutes.
- Burner ignition — For gas furnaces, listen for ignition sequence. Check for delayed ignition (a "whump" sound indicates gas buildup before ignition — safety concern).
- Heat output — Verify warm air at supply registers within 3–5 minutes. Use your hand or a thermometer — supply air should be 15–30°F above return air temperature.
- Flame color — Gas furnace flame should be steady blue with small yellow tips. Lazy yellow flames indicate incomplete combustion.
- Flue/exhaust — Check for proper draft and no spillage at the draft hood (for atmospheric-vent units). CO detector recommended.
- Filter condition — Note if dirty, missing, or wrong size. This isn't just maintenance — a clogged filter causes system failures.
Cooling System Check
- Operational test — Set thermostat to cool, lower temperature 5°F below ambient. Compressor should engage within 1–2 minutes.
- Temperature differential — Supply air should be 14–22°F cooler than return air. Outside this range indicates a potential refrigerant or airflow issue.
- Condenser unit — Check for debris, damaged fins, level pad, adequate clearance (12" minimum on sides, 60" above)
- Condensate drain — Verify it's draining properly and not backing up into the pan
Key Takeaway
Never test the AC when outdoor temperatures are below 60°F — you risk damaging the compressor. Note in your report: "Cooling system not tested due to outdoor temperature below 60°F at time of inspection. Recommend testing when weather permits." The same applies to heating when it's 90°F+ outside — the system may not stay on long enough to evaluate properly.
HVAC Documentation
- Age — Record model and serial numbers. Use manufacturer date-code charts to determine age. Most HVAC units have a 15–20 year lifespan.
- Last service date — Check the service sticker on the unit. No sticker? Note "no evidence of recent professional service."
- System type — Gas/electric furnace, heat pump, boiler, mini-split. Fuel type matters for reporting.
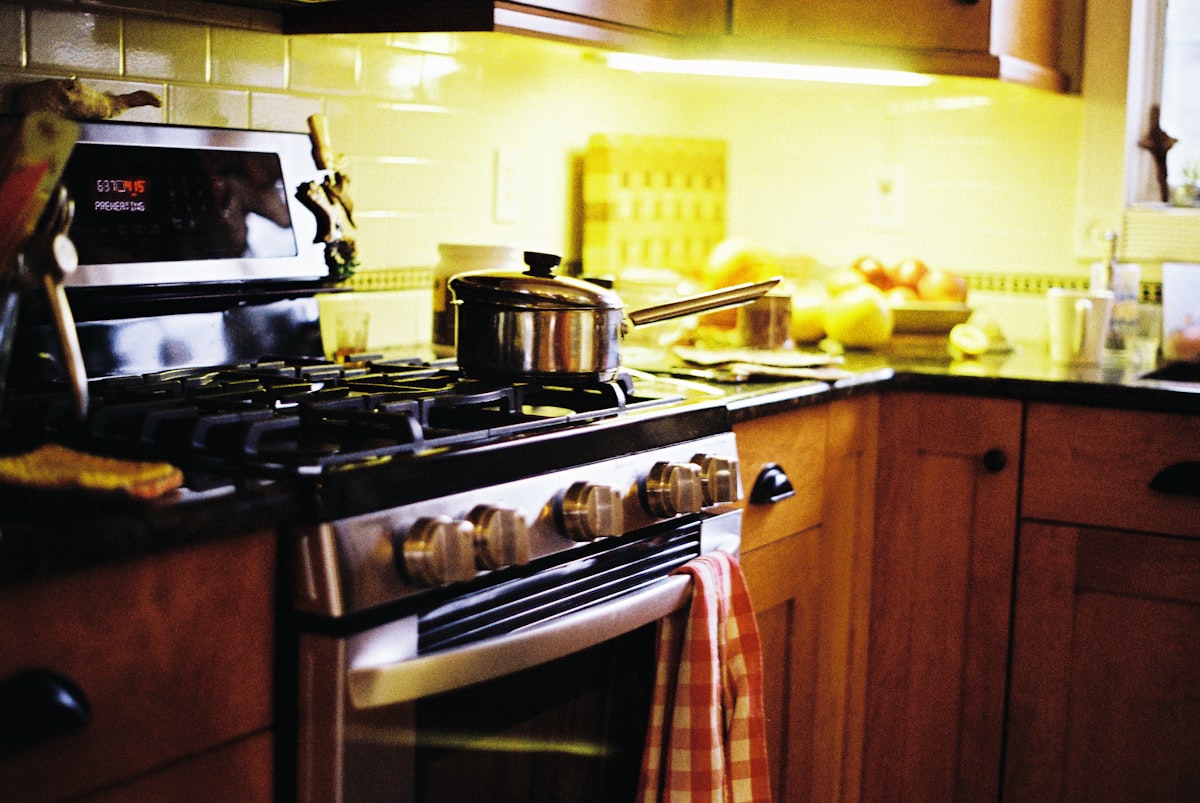
Dishwasher: Run Cycle and Leak Check
The dishwasher is the most commonly missed appliance inspection item. Too many inspectors glance at it, see it's there, and move on. Run the cycle.
What to Check
- Run a normal cycle — Start it early in the inspection so it completes before you leave. You need at least 10–15 minutes.
- Door seal/gasket — Check for cracks, mold, and proper seal. Open the door during the wash cycle briefly — no water should be pooling below the door.
- Drainage — Listen for the drain pump at the end of the cycle. Water standing in the bottom after the cycle completes indicates a drainage problem.
- Leak check — Look under the dishwasher with a flashlight before and after running it. Check the floor for water stains, warping, or soft spots. Pull out the kickplate if accessible.
- Spray arms — Open mid-cycle (if safe) and verify spray arms are rotating and spraying.
- Supply line — Check the connection under the sink for corrosion, drips, or improper materials.
- Air gap / high loop — Verify the drain line has either an air gap (mounted on the sink or counter) or a high loop under the counter to prevent backflow. This is a code requirement that's frequently missing.
Note
The dishwasher drain high loop or air gap is one of the most commonly cited deficiencies in home inspection reports. It's a simple fix, but without it, wastewater from the sink disposal can back-siphon into the dishwasher. Always check and always call it out.
Common Dishwasher Deficiencies
- No air gap or high loop on drain line
- Leaking at supply connection under sink
- Door gasket cracked or deteriorated
- Standing water after cycle completes
- Rusted interior racks (cosmetic, but worth noting)
- Detergent dispenser not opening during cycle
Range and Cooktop: Burner Test
Whether it's gas or electric, every burner gets tested. No exceptions.
Gas Range/Cooktop
- Ignition — Turn each burner to high. Igniter should click and flame should light within 3–5 seconds. Delayed ignition is a safety concern.
- Flame quality — Blue flame with defined cone shape. Yellow or orange flames indicate gas/air mixture issues.
- All burners — Test every single one. It's common to find 1 of 4 burners non-functional — often a clogged igniter port.
- Gas smell — Sniff for gas odor around the connections and behind the unit. If you smell gas, note it and recommend immediate service.
- Anti-tip bracket — Pull the range away from the wall slightly and check for an anti-tip bracket securing the rear legs. This prevents the range from tipping forward when weight is placed on an open oven door. It's a safety requirement that's missing in a shocking percentage of homes.
Electric Range/Cooktop
- Each element — Turn all burners to high. Elements should glow red within 1–2 minutes. Note any that don't heat.
- Smooth-top/induction — Verify all zones heat. Look for cracks in the glass surface — cracked glass cooktops are a safety and functionality issue.
- Controls — All knobs and controls should operate smoothly. Note any broken, missing, or misaligned knobs.
Oven Test
- Preheat — Set the oven to 350°F. It should reach temperature within 10–15 minutes.
- Temperature accuracy — Use an oven thermometer if you carry one. Variance of ±25°F from the set point is normal; beyond that, note "oven temperature may not be accurately calibrated."
- Broiler — Switch to broil and verify the upper element (electric) or upper burner (gas) ignites.
- Door seal — Check the gasket around the oven door. Hold your hand near the door edge during preheat — you shouldn't feel significant heat escaping.
- Self-clean latch — If equipped, verify the self-clean latch operates (but do NOT run a self-clean cycle during the inspection).
- Interior condition — Note any damage to racks, interior walls, or heating elements.
Built-In Microwave
Only built-in (over-the-range or cabinet-mounted) microwaves are within standard inspection scope. Countertop units are personal property and excluded.
What to Check
- Power on — Place a microwave-safe cup of water inside and run for 30 seconds. Water should be noticeably warmer.
- Turntable — Verify it rotates during operation.
- Door latch — Door should close securely. The microwave should stop immediately when the door is opened.
- Exhaust fan — Over-the-range models have built-in exhaust fans. Test all fan speeds.
- Light — Test the cooktop light on over-the-range models.
- Mounting — Over-the-range microwaves should be securely mounted to the wall and cabinet. Check for loose mounting, especially on heavier units.
Garbage Disposal
Quick and simple — but don't skip it.
What to Check
- Operation — Turn it on. It should spin freely without grinding, humming without turning, or excessive vibration.
- Drainage — Run water during operation. Water should drain freely without backing up.
- Leaks — Check underneath with a flashlight. Splash guard, flange, and discharge pipe connections are common leak points.
- Reset button — Note its location on the bottom of the unit. If the disposal doesn't operate, try the reset button before reporting it as non-functional.
- Electrical — Disposal should be connected to a switch (usually wall-mounted near the sink). Verify the switch operates the disposal and not something else (I've seen disposal switches wired to the dishwasher more than once).
Key Takeaway
Never put your hand inside a garbage disposal — even when it's off. Use a flashlight to look for debris, foreign objects, or corrosion. If it hums but doesn't spin, it's likely jammed — note it and recommend service.
Range Hood and Exhaust Fans
Ventilation is critical for indoor air quality and moisture control. Test every exhaust fan in the house.
Range Hood / Over-Range Exhaust
- Fan operation — Test all speed settings. Fan should spin freely without excessive noise or vibration.
- Light — Test the hood light on all settings.
- Venting — Determine if the hood vents to the exterior or recirculates. Exterior venting is preferred but not always possible. Check the exterior vent termination for proper damper operation.
- Filter condition — Remove and inspect the grease filter. Heavily clogged filters reduce ventilation effectiveness and are a fire hazard.
- Capture effectiveness — Run the fan on high and hold a tissue near the filter face. It should pull toward the hood. If not, the fan motor may be failing or the duct may be obstructed.
Bathroom Exhaust Fans
- Operation — Test each fan. Listen for bearing noise (squealing, grinding).
- Venting — Verify fans vent to the exterior, not into the attic. Attic-terminated bath fans are one of the most common deficiencies in any home inspection and a major source of moisture damage. See our attic inspection guide for more on this issue.
- Airflow — Hold a tissue to the fan grille while running. It should hold the tissue in place. Weak suction indicates a failing motor or blocked duct.
Refrigerator
Here's where scope gets tricky. The refrigerator is often personal property — the seller may take it with them. Many SOPs consider it outside standard scope. However, if the refrigerator is present and included in the sale, most inspectors will do a basic check.
Basic Refrigerator Check
- Cooling — Is it cold? Check both fresh food and freezer compartments. Fresh food should be 35–38°F; freezer should be 0°F or below.
- Ice maker — If equipped and connected, verify it's producing ice.
- Water dispenser — If equipped, verify water flow.
- Door seals — Check gaskets on all doors. The dollar bill test works: close a dollar bill in the door seal. If you can pull it out easily, the seal is worn.
- Water supply line — Check the connection behind the refrigerator for leaks, especially on copper or plastic supply lines (plastic "saddle valve" connections are notorious for leaks).
Note
Always note in your report whether the refrigerator was included in the inspection scope or excluded as personal property. This protects you from post-closing complaints about refrigerator issues that were never within your scope.
Washer and Dryer Hookups
You're not inspecting the washer and dryer themselves — those are personal property. You ARE inspecting the hookups and connections that serve them.
Washer Hookups
- Supply valves — Hot and cold shut-off valves should be present and operable. Note if they're gate valves (round handle — prone to failure) vs. quarter-turn ball valves (lever handle — preferred).
- Supply hoses — If connected, check for rubber vs. braided stainless steel. Rubber hoses are a burst risk — recommend braided stainless replacement.
- Drain — Verify the standpipe is present and properly sized (2" diameter minimum). Check for proper air gap — the drain hose should not be sealed into the standpipe.
- Drain pan — If the washer is on an upper floor, note whether a drain pan is present. It's not always required by code, but it's a smart practice.
- GFCI protection — Depending on the code cycle, laundry area receptacles may require GFCI protection. Check your local jurisdiction.
Dryer Hookups
- Vent — This is the big one. Dryer vents are a leading cause of house fires. Check for:
- Material — Rigid metal duct is required. Flexible foil or vinyl duct is a fire hazard and code violation in most jurisdictions.
- Length — Maximum 25 feet with reductions for each elbow (5 feet per 90° turn, 2.5 feet per 45° turn)
- Termination — Exterior termination with a proper damper. Screen-type covers trap lint and should be replaced with damper-style caps.
- Connections — Foil tape at joints, not screws (screws catch lint)
- Gas connection — If gas dryer hookup, verify proper flexible gas connector and accessible shut-off valve.
- 240V outlet — For electric dryers, verify proper 240V receptacle. Note 3-prong vs. 4-prong — 4-prong is the current standard.
Age and Lifespan Expectations
Knowing typical appliance lifespans helps you frame your findings for the client. When something's working today but approaching end-of-life, it's worth noting.
| Appliance | Average Lifespan |
|---|---|
| Gas furnace | 15–20 years |
| Central AC | 15–20 years |
| Heat pump | 12–15 years |
| Water heater (tank) | 8–12 years |
| Water heater (tankless) | 20+ years |
| Dishwasher | 9–12 years |
| Gas range | 15–17 years |
| Electric range | 13–15 years |
| Microwave (built-in) | 9–10 years |
| Garbage disposal | 8–12 years |
| Refrigerator | 12–15 years |
| Washer | 10–13 years |
| Dryer | 10–13 years |
How to Determine Age
- Model/serial number — Record these for every major appliance. Manufacturer date codes are embedded in serial numbers. Websites like Building Intelligence Center decode most brands.
- Data plates — Usually inside the door frame, on the back panel, or inside the unit near the access panel.
- No data plate? — Note "age could not be determined; data plate missing or illegible."
What's Excluded Per SOP
Knowing what you DON'T inspect is just as important as knowing what you do. Going beyond scope creates liability without compensation.
Standard Exclusions
- Countertop/portable appliances — Toaster ovens, countertop microwaves, portable dishwashers, window AC units
- Clothes washers and dryers — Personal property; you inspect the hookups, not the machines
- Recreational appliances — Wine coolers, beverage centers, outdoor kitchens (unless specifically agreed upon)
- Thermostatic controls — You verify the system responds to the thermostat; you don't calibrate or test accuracy of smart thermostats
- Internal components — You don't disassemble appliances. If you can't see it without tools, it's outside scope.
- Timer accuracy — You don't test whether the oven timer, dishwasher cycle timer, or microwave timer is accurate
- Cosmetic conditions — Scratches, dents, discoloration — not part of a functional inspection unless they affect operation
- Efficiency testing — You don't measure energy efficiency, BTU output, or SEER ratings
Note
When you encounter an appliance issue that's beyond your scope, use clear language: "Recommend evaluation by a qualified appliance technician." Don't diagnose the specific cause — that's the technician's job. Your role is to identify the symptom and recommend further evaluation.
Common Deficiencies: The Hits You'll See Every Week
After a few hundred inspections, you'll see the same deficiencies over and over. Here's the greatest hits list:
- Missing dishwasher air gap or high loop — Found in 30–40% of homes
- Missing range anti-tip bracket — Found in 50%+ of homes with freestanding ranges
- Bathroom exhaust fans venting into attic — Especially in homes built before 2000
- Dryer vent with flex foil or vinyl duct — Common DIY installation error
- Dirty HVAC filters — Nearly universal. Always note it.
- HVAC system past typical lifespan — 20+ year old furnaces and AC units are everywhere
- Gas water heaters with improper venting — Particularly in older homes. See our water heater inspection guide.
- Missing or non-functional GFCI protection in kitchen and laundry areas
- Refrigerator water supply line leaking — Usually at the saddle valve connection
- Range hood recirculating instead of venting exterior — Common in condos and remodeled kitchens
Document Everything, Efficiently
The appliance section of your report should be methodical and consistent. Every appliance gets the same treatment: identify it, note its age/condition, test it, document any deficiencies, and move on. The client doesn't need a novel — they need clear findings with photos.
If you're spending 20 minutes typing up appliance findings on your laptop, you're doing it wrong. ReportWalk for iOS lets you walk through the kitchen narrating findings as you test each appliance — "dishwasher, ran normal cycle, no leaks observed, missing high loop on drain line, recommend correction" — and it structures everything into your report. Talk through it, move on, next appliance. That's how you keep a 3-hour inspection from turning into a 4-hour one.
Appliance inspection isn't glamorous, but it's where your thoroughness shows. Clients remember the inspector who caught the missing anti-tip bracket and the leaking dishwasher supply line. Build a system, run it every time, and your reports will speak for themselves.