Electrical Panel Inspection Checklist: What Home Inspectors Should Check and Call Out
An electrical panel inspection checklist should do two jobs for a home inspector. First, it should keep you from missing the obvious high-risk items. Second, it should help you decide which defects deserve a stronger call-out in the report instead of a soft “recommend electrician” throwaway line.
That distinction matters. Not every panel note carries the same weight. A faded directory is not the same as heat damage. An open knockout is not the same as active moisture inside the cabinet. Good inspectors do not just collect defects. They rank them correctly and write them clearly.
This is a field routine for what to check, what to photograph, and what to call out harder when the conditions justify it.
Important
Do not open a panel that appears unsafe to inspect. Water intrusion, active arcing signs, severe corrosion, or unstable components are limitations first and findings second.
The Quick Field Sequence
If you need the short version before the longer discussion, use this order:
- Check access and surroundings
- Inspect the panel exterior
- Determine whether it is safe to open
- Photograph the label and open panel overview
- Work top to bottom inside the cabinet
- Photograph each defect with context and close-up
- Rank findings by safety significance before writing the narrative
That last step is where many reports improve. The inspection is not over when you see the defect. It is over when you decide how hard to call it out.
Before You Touch the Cover
Start with the area around the panel.
Check:
- Adequate working access
- Signs of leaks above or near the panel
- Rust, impact damage, scorch marks, buzzing, or odor
- Missing dead-front screws or mismatched fasteners
- Storage or other obstructions that limit safe removal
If the panel is blocked or unsafe, photograph the limitation and document why the interior was not inspected. InterNACHI's SOP overview is useful background for how limitations are commonly framed in home inspection reporting.
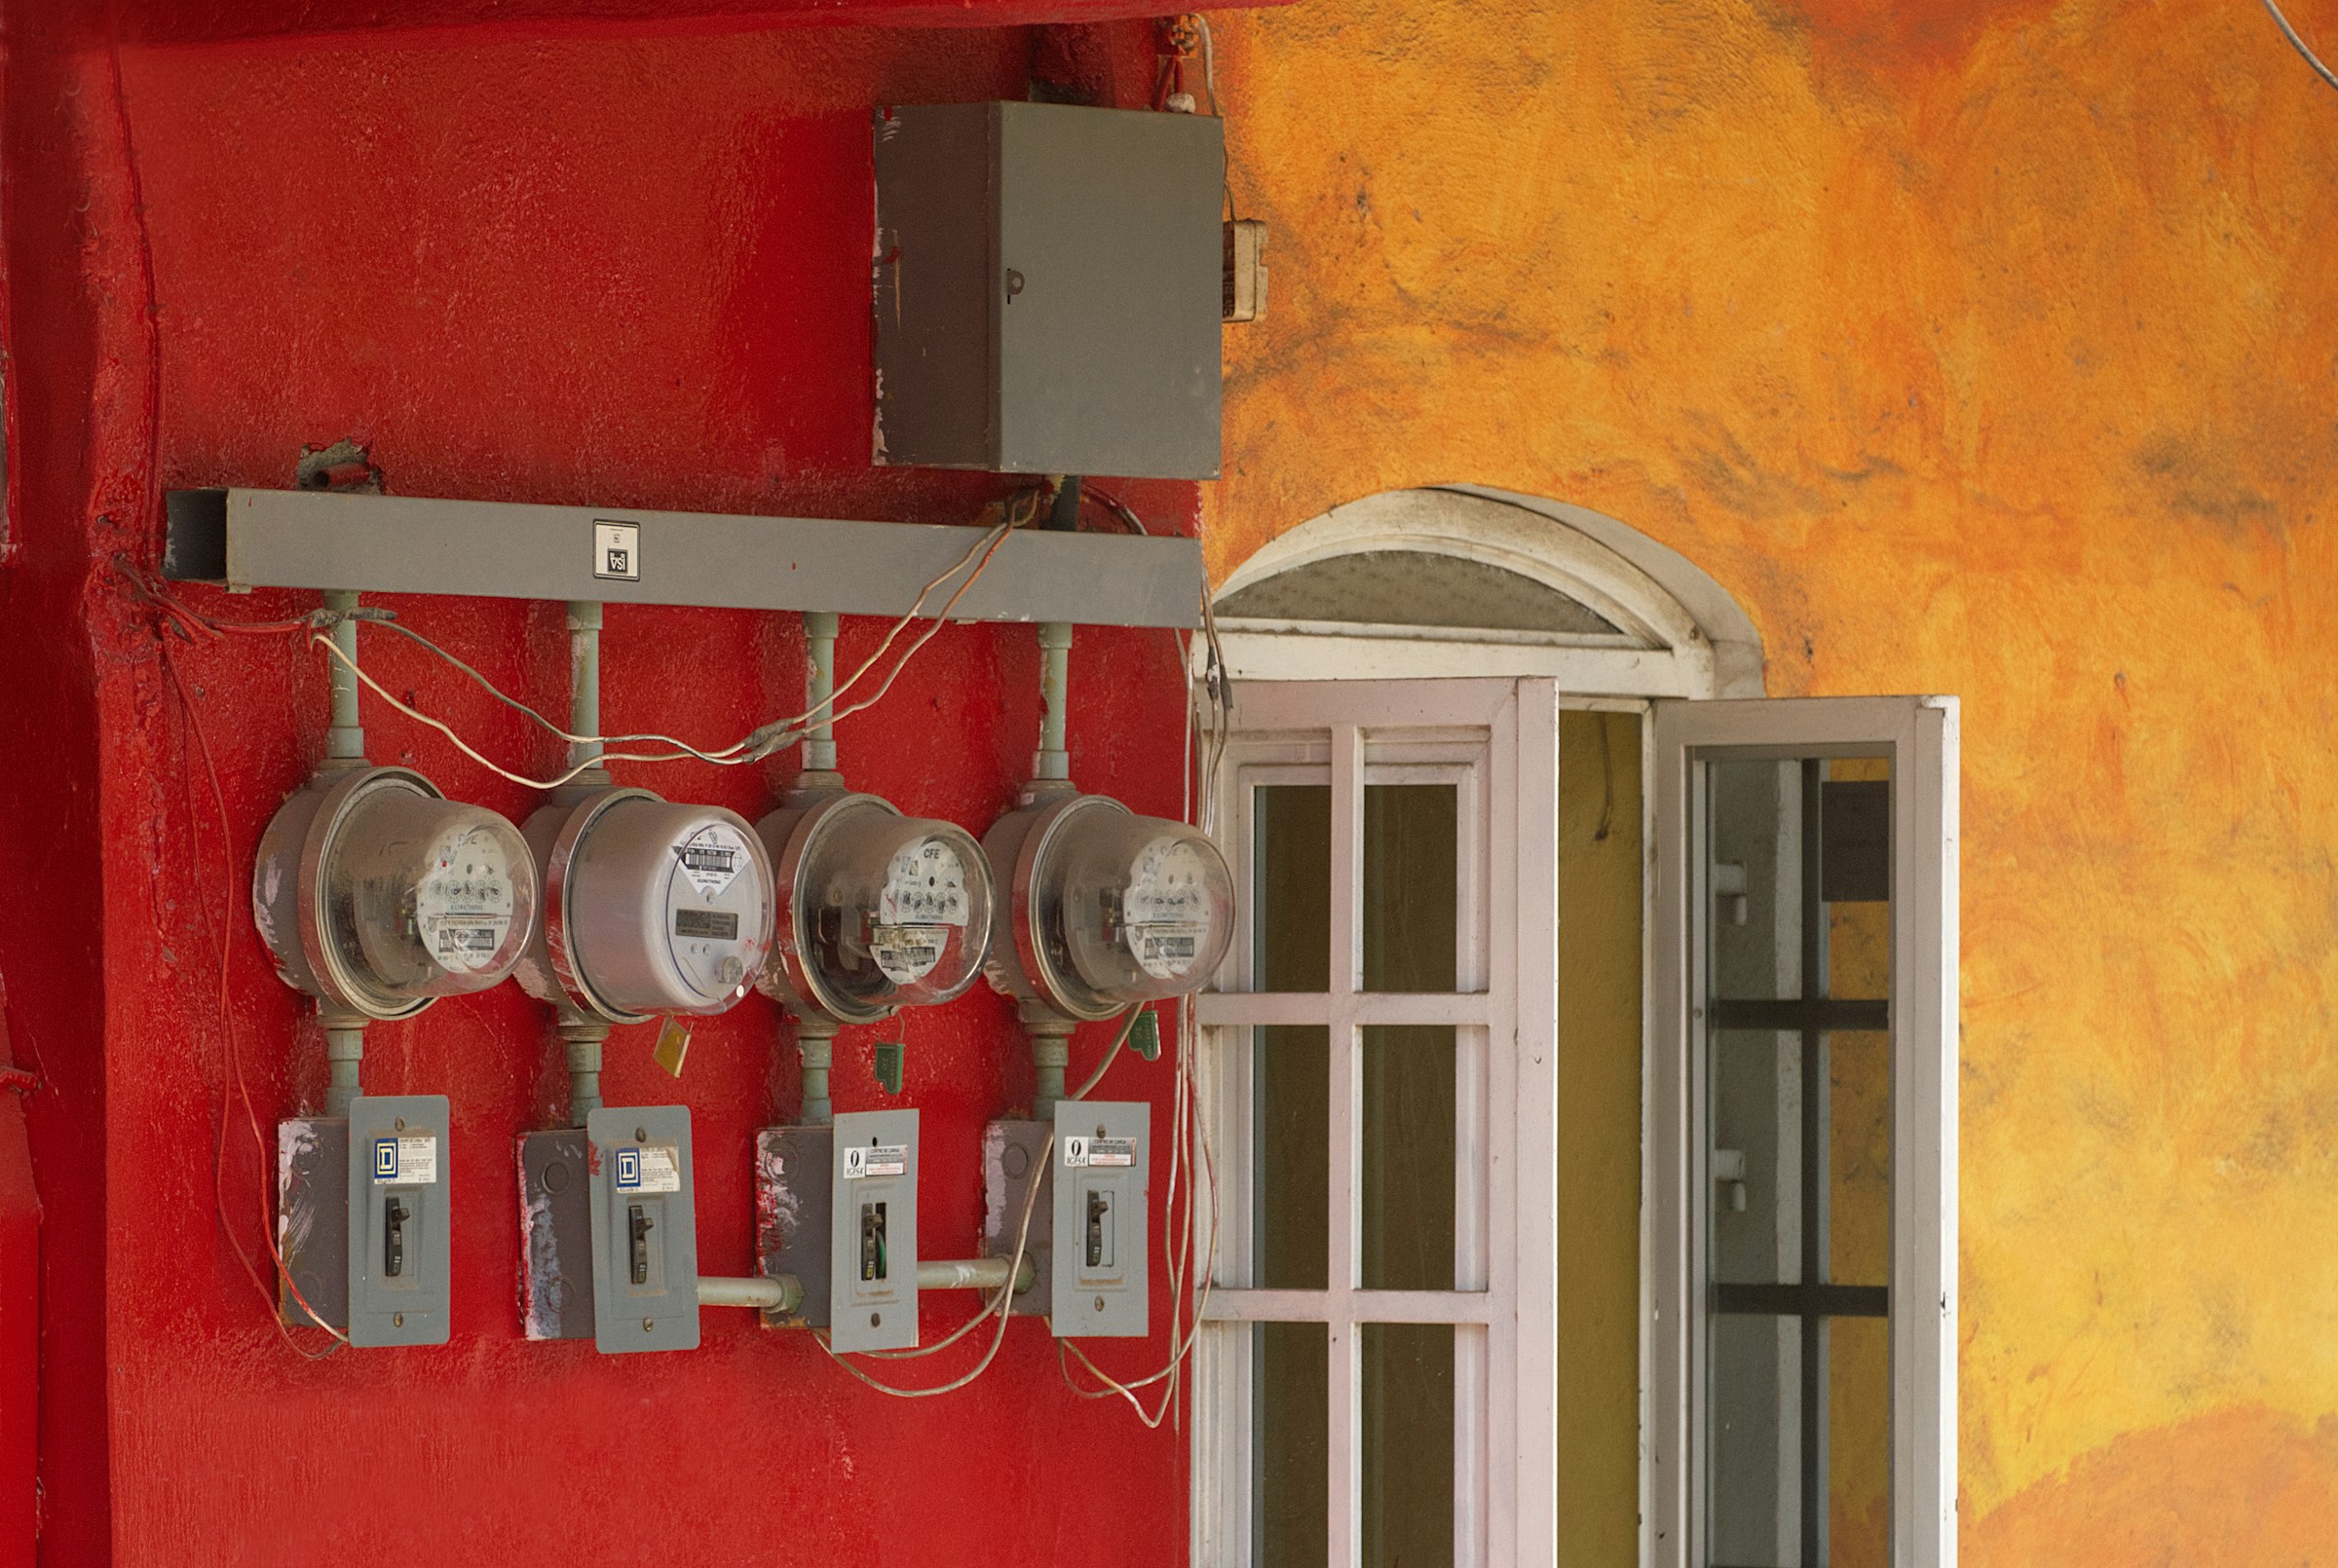
Exterior Panel Items That Still Matter
Even without removing the cover, you can gather important information:
- Manufacturer and panel type
- Main disconnect size if labeled
- Directory presence and legibility
- Open knockouts
- Rust or moisture staining
- Physical damage to cabinet or cover
- Evidence of overheating at breaker edges or cover
These are not filler observations. Exterior issues often correlate with deeper problems inside the panel.
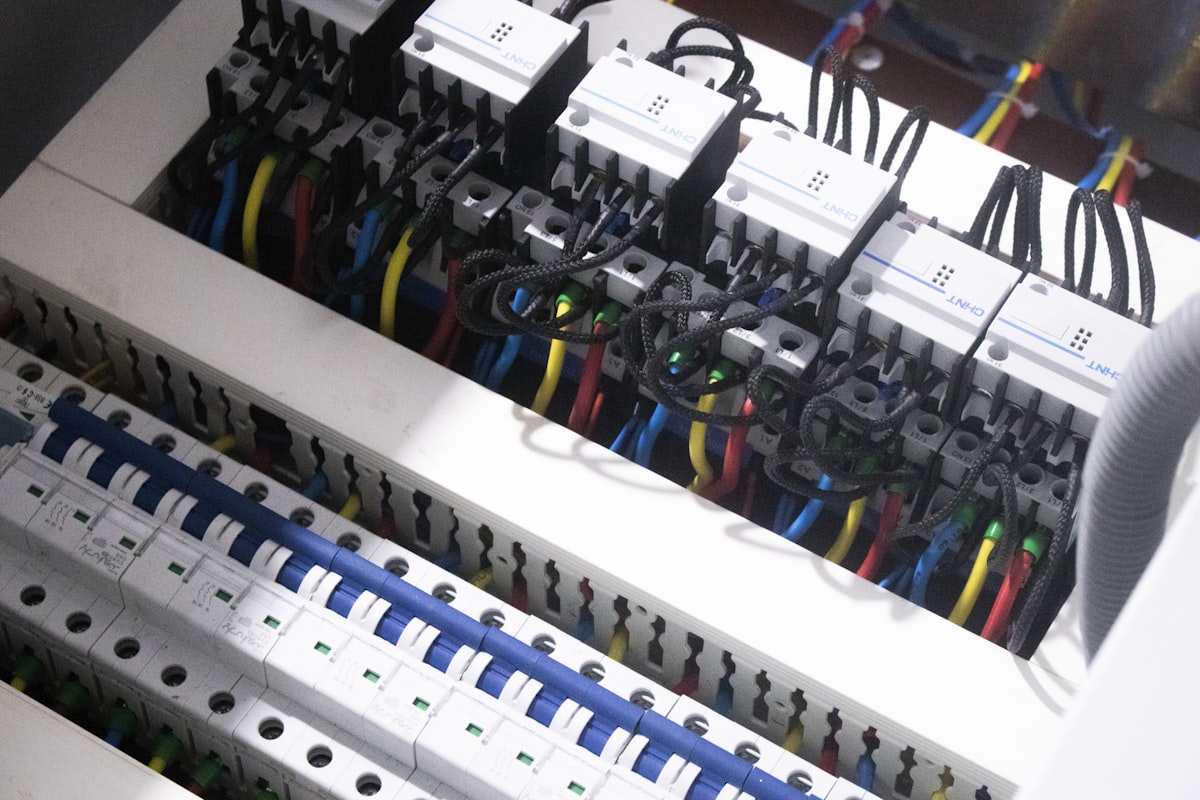
What to Check Inside the Panel
If the panel is safe to open, follow a repeatable scan.
1. Service conductors and main area
Look for:
- Heat discoloration
- Corrosion
- Improper conductor terminations
- Damaged insulation
These findings deserve attention because defects near the service entrance can affect the whole system.
2. Breakers and branch circuit terminations
Check for:
- Double-tapped breakers
- Improperly matched breakers
- Evidence of overheating
- Loose-looking or poorly landed conductors
- Mixed breaker brands that may not be listed for the panel
The U.S. Consumer Product Safety Commission archive on Federal Pacific concerns is still one of the most cited references when discussing legacy panel risk history. Use authoritative references when you need context, but keep your report anchored to what you observed.
3. Neutral and grounding terminations
Look for:
- Multiple neutrals under terminals not rated for it
- Neutrals and grounds mixed improperly in subpanels
- Corrosion or contamination at the bars
- Conductors that appear loose, damaged, or poorly dressed
This is a common area for amateur modifications and service-upgrade shortcuts.
4. Cabinet entries and workmanship
Check:
- Missing connectors or clamps
- Sharp edges contacting conductors
- Openings into the cabinet
- Sheathing stripped back too far
- Messy conductor routing that suggests poor workmanship
Poor cable entry details do not always create immediate failure, but they often tell you how carefully the rest of the work was done.
Which Findings Deserve a Stronger Call-Out
This is where the checklist becomes useful instead of generic.
Strong call-out items
- Heat damage or melted insulation
- Moisture intrusion or corrosion inside the cabinet
- Evidence of arcing or scorching
- Legacy panels with known reliability concerns
- Improper subpanel bonding
- Severely compromised terminations
- Multiple compounding defects in one panel
These are the findings where weak language lets the client underestimate the issue.
Moderate call-out items
- Missing directory details
- Open knockouts
- Minor rust at cabinet exterior
- Blocked access
- Single improper breaker or termination issue without visible heat damage
These still matter, but the narrative should match the actual observed severity.
Key Takeaway
The phrase “recommend licensed electrician evaluation” is not the whole narrative. Say what you observed first, then why it matters, then who should address it.
The Photo Set That Makes the Report Stronger
For most panels, collect:
- One photo of the panel closed
- One photo of the manufacturer label or directory
- One wide photo of the opened panel
- One close-up per defect
- One extra context photo for moisture or heat-related issues
When defects involve a specific breaker or terminal, make sure the photo is close enough that a contractor can tell what you are referring to.
Report Language That Actually Helps
Bad panel narratives make good inspections look weak.
Weak
“Electrical panel has issues. Recommend electrician.”
That tells the client almost nothing.
Better: moisture
“Corrosion and moisture-related staining were observed within the electrical panel cabinet. Moisture inside electrical equipment can contribute to deterioration and unsafe operating conditions. Recommend prompt evaluation and repair by a licensed electrician, along with correction of the moisture source.”
Better: double-tapped breaker
“Two conductors were observed under a breaker terminal at the main electrical panel. This condition may contribute to an improper or unreliable connection depending on breaker listing and terminal rating. Recommend correction by a licensed electrician.”
Better: heat damage
“Heat-related discoloration and conductor insulation damage were observed at branch circuit terminations inside the electrical panel. These conditions may indicate abnormal heating or poor electrical connections. Recommend prompt evaluation and repair by a licensed electrician.”
Better: legacy panel
“The home is equipped with a Federal Pacific electrical panel. This panel type has a widely documented history of reliability concerns. Recommend evaluation by a licensed electrician and discussion of replacement options.”
The structure is simple: condition, consequence, recommendation.
Common Mistakes Inspectors Make at the Panel
They turn the report into a code lecture
Most clients do not need a code seminar. They need a clear explanation of what was seen and what should happen next.
They overstate certainty
Say “appears,” “observed,” and “recommend evaluation” where appropriate. Do not diagnose hidden internal failures you cannot confirm visually.
They under-rank heat and moisture
Those are the findings where you should sound more decisive, not less.
They forget the limitation language
If the panel could not be safely opened or was materially obstructed, the limitation belongs in the body of the report, not just your memory of the inspection.
How This Fits Into the Rest of the House
A strong panel write-up is not isolated from the rest of the inspection. It connects to:
- Service age and upgrades
- Moisture conditions in the garage, basement, or utility area
- Unsafe amateur modifications elsewhere
- GFCI/AFCI issues noted at receptacles
That cross-check is part of why the panel deserves more than a 60-second glance.
For related reading, Electrical Panel Safety Red Flags, 4 Point Inspection Report, and How to Write Home Inspection Report all connect well here.
Where ReportWalk Helps
Electrical panel findings are the kind that get weaker if you wait until evening to write them. “Possible panel issue” is what happens when you rely on memory. ReportWalk helps you dictate the exact breaker position, observed condition, implication, and recommendation while the open panel is still in front of you, then pair that note with the right photo before you move on.
That is how panel reports get sharper. Not because the defects changed, but because the documentation stayed specific.