Roofing Inspection Checklist: The Complete Guide for Inspectors
The roof is the first line of defense on every structure you inspect. It's also the component most likely to generate callbacks, insurance disputes, and client complaints — because roof problems are expensive, and nobody wants to hear about them after closing.
Whether you're doing a standalone roof certification, a full home inspection, or a storm damage assessment, you need a systematic approach. Not "walk the roof and look around." A system that catches the subtle stuff — the flashing that's been tarred over, the kickout that was never installed, the ventilation math that doesn't add up.
This is that checklist. Built for inspectors who get on roofs, not for homeowners reading blog posts.
Safety First: Before You Step On
Let's get this out of the way because it matters more than anything else on this list.
Access Decision
Not every roof should be walked. Make this decision before you set up the ladder:
- Pitch: 6/12 and below is generally walkable with proper footwear. 7/12 to 8/12 is conditional — depends on material, moisture, and your experience. Above 8/12, use alternative methods.
- Material: Tile and slate are fragile. Walking a tile roof causes more damage than it reveals. Use binoculars, a drone, or a ladder at multiple locations.
- Conditions: Wet, frosted, or icy roofs are a hard no. Morning dew counts.
- Height: Three stories and above — consider your fall protection equipment and training honestly.
- Structural: Visible sagging or spongy decking underfoot means get off immediately.
Equipment
- Ladder: Properly rated, extends 3 feet above eave line, secured at base
- Footwear: Soft-soled, slip-resistant. Running shoes work better than work boots on most shingle roofs.
- Fall protection: Harness and roof anchor for anything above your comfort threshold
- Tools: Binoculars, moisture meter, flat pry bar (for lifting shingle edges), tape measure, drone (if equipped)
Pro tip: Tell someone you're going on the roof. If you're a solo inspector — which most of us are — send a text to your office or spouse before you climb. It's a basic safety protocol that could save your life.
Roofing Materials Assessment
Asphalt Shingles (80% of What You'll See)
The most common residential roofing material. Inspection points:
- Granule loss: Run your hand across the surface. Some granule loss is normal on aged shingles. Bald spots and exposed fiberglass mat are end-of-life indicators. Check gutters for granule accumulation — a better gauge than the shingle surface alone.
- Curling: Shingle edges turning up (cupping) or corners turning down (clawing). Both indicate either age, poor ventilation, or defective product.
- Cracking: Thermal cycling damage. Hairline cracks are early-stage. Visible mat exposure through cracks is late-stage.
- Blistering: Bubbles in the shingle surface. Small sealed blisters are cosmetic. Popped blisters exposing mat are deterioration points.
- Missing shingles: Note location and pattern. Random missing shingles suggest wind damage. Missing shingles along rakes or eaves suggest installation issues.
- Nail pops: Visible nail heads pushing through shingles. Each one is a leak waiting to happen.
- Layering: Is this roof installed over an existing layer? Check at the eave edge. Two layers max in most jurisdictions. Three layers is always a defect.
- Age assessment: Manufacturer date isn't available in the field. Estimate based on condition, granule loss, and flexibility. A shingle that cracks when you lift a corner is well past its service life.
Metal Roofing
- Fastener condition: Exposed fastener panels — check washer seals, backing out, rust
- Panel alignment: Straight, consistent overlap
- Sealant: At penetrations and transitions — condition and coverage
- Rust/corrosion: Especially at cut edges and screw penetrations
- Oil canning: Waviness in flat areas — cosmetic but document it
- Expansion gaps: Metal expands significantly. Proper installation accounts for this at ridges and eaves.
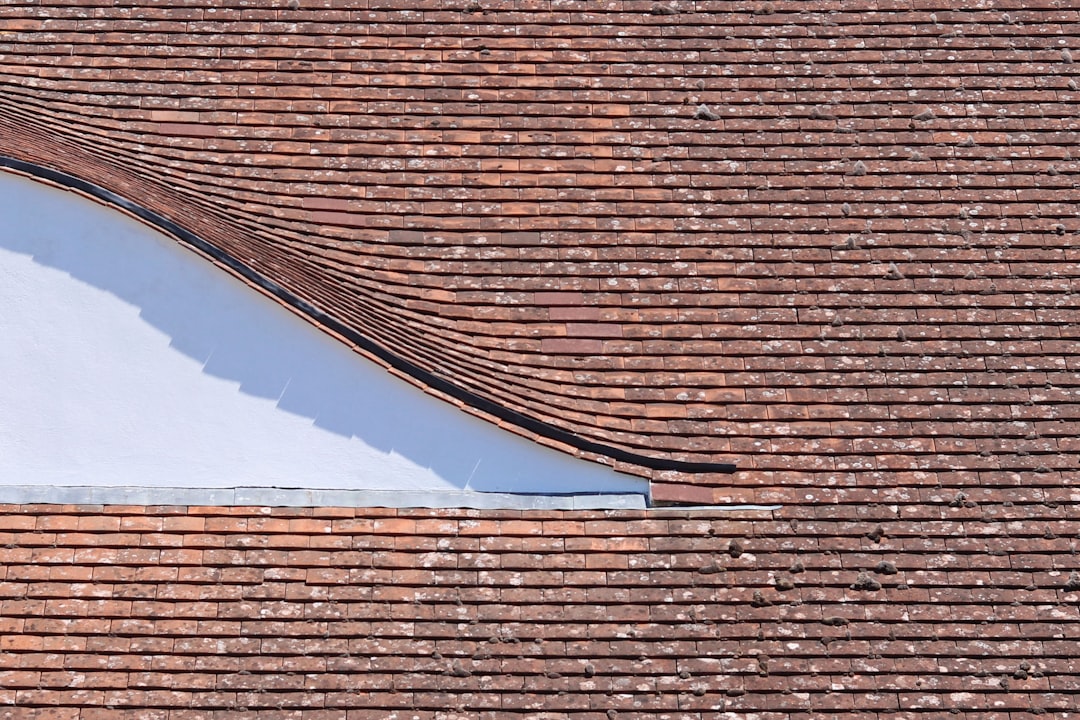
Tile (Clay and Concrete)
- Cracked/broken tiles: Walk with extreme care or inspect from ladder
- Slipped tiles: Tiles that have moved from their original position
- Underlayment: The real waterproofing under tile roofs. Check where tiles are missing or displaced.
- Ridge tiles: Mortar condition, adhesion
- Flashing integration: Tile-to-flashing transitions require specific details
Flat/Low-Slope (TPO, EPDM, Modified Bitumen, BUR)
- Membrane condition: Splits, punctures, seam separation, surface erosion
- Ponding water: Any standing water 48 hours after rain is a defect
- Flashings: Base flashings at parapets, counter flashings, edge metal
- Drainage: Scuppers, internal drains — clear and functional
- Penetration seals: Pipe boots, curbs, HVAC units
- Ballast: If ballasted, proper depth and no displacement
Pro tip: On flat roofs, ask when it last rained. If it rained two days ago and you see standing water, that's ponding. If it rained two hours ago, that's normal drainage. Context matters.
Flashing and Penetrations
Flashing failures cause more leaks than shingle failures. This section deserves extra attention.
Chimney Flashing
- Step flashing: Present at chimney-to-roof intersection, not just caulked
- Counter flashing: Embedded in or attached to chimney masonry, overlapping step flashing
- Cricket/saddle: Required on the upslope side of chimneys wider than 30 inches. If it's missing, water pools behind the chimney — and it will leak.
- Caulk vs. proper flashing: If you see a thick bead of roofing tar where flashing should be, that's a repair — not a proper installation. Document it.
Plumbing Vent Boots
- Boot condition: Rubber boots crack and split after 10-15 years. Lift the shingle edge and check the base.
- Seal: The rubber gasket around the pipe should be snug, not cracked or separated
- Flange: Shingles should overlap the upper portion of the boot flange; lower portion overlaps the shingles below
Valleys
- Type: Open (metal valley), closed-cut, or woven
- Metal valleys: Corrosion, debris accumulation, proper width (gets wider toward eave)
- Closed-cut valleys: Shingle edges straight, not fraying, proper overlap
- Woven valleys: Shingles properly interwoven, no buckling
- Ice dam evidence: Staining, damaged shingles, or prior ice/water shield visible at valley bases
Other Penetrations
- Skylights: Flashing intact, curb sealed, glazing condition, weep holes clear
- Exhaust vents: Proper boot, proper cap, screen present
- Satellite dishes/solar mounts: Sealed penetrations, proper flashing. Lag bolts through shingles into decking with just sealant is the most common deficiency.
- Roof-to-wall transitions: Step flashing present, kickout flashing at bottom where roof meets a sidewall (missing kickout flashing is one of the most damaging defects you'll find — water channels directly into the wall cavity)
Pro tip: Missing kickout flashing is responsible for more concealed wall rot than any other single defect. If a roof plane terminates at a sidewall, check for it. If it's not there, probe the wall at that corner with a moisture meter. You'll find damage more often than not.
Gutters and Drainage
Gutters aren't technically roofing, but they're part of the roof drainage system and you're already up there.
- Attachment: Secure to fascia, no sagging or pulling away
- Slope: Should slope toward downspouts — visible sagging or reverse slope means standing water
- Condition: Rust (steel), cracks (aluminum), joint separation, sealant failure
- Downspouts: Present at appropriate intervals, connected and sealed at gutter, discharge away from foundation
- Screens/guards: If present, note type and condition. Some gutter guards actually make drainage worse by impeding water entry during heavy rain.
- Debris: Full gutters aren't just a maintenance issue. They hold water against the fascia and can cause ice dams in cold climates.
- Drip edge: Present at eaves and rakes, properly installed (under underlayment at eaves, over underlayment at rakes)
Ventilation and Insulation
Ventilation problems cause more premature roof failures than weather does. This is the section most inspectors rush through.
Calculating Ventilation
The standard: 1 square foot of net free ventilation area per 150 square feet of attic floor area (1:150 ratio). With a proper vapor barrier and balanced intake/exhaust, this can be reduced to 1:300.
- Intake: Soffit vents — count them, estimate net free area. Continuous soffit vents provide more than individual round or rectangular vents.
- Exhaust: Ridge vent, roof-mounted vents, gable vents, powered fans
- Balance: Intake should equal or exceed exhaust. The most common ventilation problem isn't too little total ventilation — it's too much exhaust and not enough intake, which pulls air from leaks in the building envelope instead of through the soffits.
- Don't mix types: Ridge vents and gable vents together can short-circuit airflow. Ridge vents and powered fans create negative pressure issues.
What to Look for in the Attic
- Frost or condensation: On sheathing underside — ventilation or air sealing problem
- Mold or staining: Same cause as above, further progressed
- Insulation blocking soffits: Baffles should maintain airflow channel from soffit vent to attic space
- Cathedral ceilings: Need vent channels from eave to ridge in every rafter bay. Difficult to verify without removing finishes.
- Bathroom/kitchen exhaust: Terminating into attic is a major moisture source. Must be ducted to exterior.
Pro tip: In winter, look at the roof from outside after a snowfall. Uneven snow melt patterns reveal insulation gaps and air leakage points better than any thermal camera.
Interior Signs of Roof Issues
Don't leave the attic without checking, but also check from the living space:
- Ceiling stains: Water rings, discoloration — note location relative to roof features above
- Peeling paint: At ceiling and upper walls, especially in rooms below valleys, penetrations, or transitions
- Bulging or soft drywall: Active moisture behind the finish
- Musty odors: In upper floor closets and rooms — can indicate concealed roof leaks
- Daylight in attic: Through sheathing penetrations, ridge, or gaps
- Active drips: After rain, obviously — but also check during inspection if conditions allow
Track the leak point in the attic if you can. Water travels along rafters and sheathing before it drips — the stain on the ceiling may be several feet from the actual entry point.
Documentation and Photography Tips
Roof documentation is harder than other inspection areas because:
- You're on a roof (unstable footing, limited access to devices)
- Photos look similar without context (one shingle photo looks like the next)
- Defect locations are hard to describe in text ("the third shingle from the left in the fifth course above the northeast dormer" — good luck)
Photo Strategy
- Orientation shots: Each roof plane from ground level before you climb. This gives your reader context.
- Overview shots: From the roof, each slope. These establish condition.
- Detail shots: Every defect — close enough to see the problem, with enough context to locate it
- Reference shots: Include something for scale — your finger, a tape measure, a coin
- Cardinal directions: Start each roof plane with a mental note of which direction you're facing. "South-facing slope" is infinitely more useful than "the back roof" in your report.
The Narration Approach
Here's the thing about roof inspections: both your hands are often occupied. One on the roof for balance, one on the phone for photos. Typing notes is physically impossible in most situations.
Good inspectors solve this by taking photos and trying to remember details until they get back to the truck. Better inspectors use voice memos. The best inspectors narrate continuously so nothing gets lost.
How ReportWalk Handles Roof Documentation
ReportWalk was practically designed for roof inspections. You're already narrating what you see — "south slope, 3-tab shingles, moderate granule loss, two cracked shingles near ridge, flashing at plumbing vent is pulled away" — and ReportWalk turns that narration into your report.
No stopping to type. No remembering details later. No sitting at your desk for an hour trying to reconstruct what you saw on a roof you inspected six hours ago.
You talk through your findings while you're looking at them. The report writes itself in real time. Every defect gets captured with the specificity and context it needs, because you're describing it while you're staring at it — not from memory.
For roof certifications and storm damage assessments where detail density is high and documentation standards are strict, the difference between voice-documented and typed-later reports is night and day.
Try ReportWalk free → — narrate your next roof inspection instead of typing it, and deliver better reports in less time.