Condo Inspection Checklist: What's Different from Single-Family Homes
Condo inspections trip up a lot of inspectors — especially those who built their career on single-family homes. The scope is different, the access is limited, and the line between "your unit" and "the association's problem" can be blurry. If you don't set expectations clearly and adjust your inspection protocol, you'll either over-promise, under-deliver, or end up in a scope dispute with a buyer who thought you'd inspect the entire building.
This condo inspection checklist covers what practicing inspectors need to know: what's in scope, what's out, where the common pitfalls hide, and how to document findings in a way that protects both your client and your business. Whether you're inspecting a high-rise in downtown Seattle, a townhouse-style condo in the suburbs, or a converted loft in a historic building, the fundamentals here apply.
Why Condo Inspections Are Different
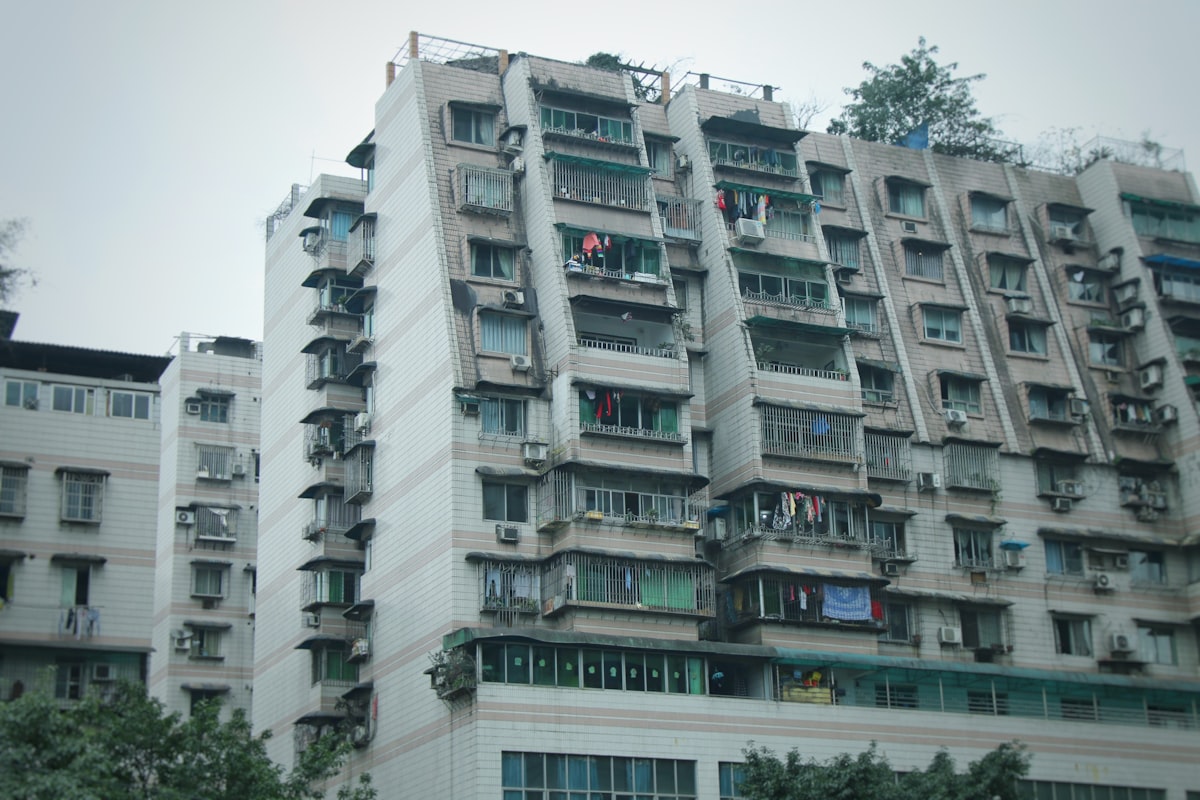
The core difference is simple: you're inspecting the unit, not the building. In a single-family home, you evaluate the entire structure from the roof to the foundation. In a condo, your scope typically covers only the individual unit and its systems — the space between the interior walls, the appliances, the in-unit HVAC, the electrical panel serving the unit, the plumbing fixtures, and the windows and doors that are the owner's responsibility.
Everything outside the unit — the roof, the exterior walls, the foundation, the common area plumbing and electrical, the elevator, the parking structure — belongs to the homeowners association (HOA). That doesn't mean you ignore the building entirely. You should note visible concerns in common areas as a courtesy. But your inspection contract and report should clearly define the scope as the individual unit.
Note
According to the National Association of Realtors, condos and co-ops accounted for approximately 12% of all existing home sales in 2025. In urban markets like Seattle, San Francisco, Chicago, and Miami, that percentage is significantly higher. Condo inspections are a growing niche, and inspectors who handle them well earn repeat business from agents who specialize in condo sales.
Pre-Inspection: Setting Scope and Expectations
Before you show up with your clipboard, handle the logistics that make condo inspections tricky:
Access Considerations
- Unit access — Confirm who's providing access (listing agent, owner, property manager) and whether you need a key, fob, or code
- Utility status — Verify that electricity, gas, and water are on. Vacant condos are often winterized or have utilities shut off.
- HVAC access — In some buildings, the HVAC system serves multiple units or is located in a mechanical room you may not have access to
- Electrical panel location — The main panel serving the unit may be inside a utility closet in the hallway or basement, not inside the unit
- Attic/crawl space — Most condos don't have accessible attics or crawl spaces from the unit. If the unit is a top floor, there may be an accessible attic hatch. Ground-floor units may have crawl space access.
- Water heater — May be in-unit, in a common mechanical room, or may be a building-wide central hot water system
Key Takeaway
Always ask the real estate agent before the inspection: "Where is the electrical panel, the water heater, and the HVAC system for this unit?" If any are in common areas, request access in advance. Showing up and discovering you can't access the panel wastes everyone's time.
Your Inspection Agreement
Your condo inspection agreement should explicitly state:
- Inspection scope is limited to the individual unit
- Common areas, building systems, roof, and exterior are excluded
- You'll note visible concerns in common areas but are not responsible for evaluating building-wide systems
- Limited access areas (locked mechanical rooms, attic spaces above other units, etc.) are excluded from the inspection
This protects you from callbacks like "You didn't tell me the roof was bad" — which was never your scope to begin with.
The Condo Inspection Checklist: What to Inspect
1. Entry and Interior Doors
- Entry door — Deadbolt, lock function, weatherstripping, fire rating (if required)
- Interior doors — Operation, hardware, clearance over flooring
- Sliding glass doors — Track condition, lock function, screen, weatherstripping
- Door to balcony/patio — Threshold, seal, lock
2. Windows
Windows are a major focus in condo inspections. They're often the owner's responsibility to maintain, and they're a primary source of problems:
- Operation — Do they open, close, and lock properly?
- Seals — Look for fogged double-pane glass indicating seal failure
- Weatherstripping — Deteriorated weatherstripping causes drafts and moisture intrusion
- Condensation — Interior condensation can indicate ventilation problems, especially in high-rise units with tight building envelopes
- Flashing and caulking — Check the interior side for signs of water intrusion around window frames
Our window and door inspection guide covers detailed evaluation protocols.
3. Electrical System
- Main panel or sub-panel — Locate the panel serving the unit. Check for proper labeling, double-tapped breakers, signs of overheating, and appropriate breaker sizing. See our electrical inspection checklist.
- GFCI protection — Test all GFCI outlets in kitchens, bathrooms, and within 6 feet of water sources
- AFCI protection — Check bedrooms and living areas per current code requirements
- Outlet testing — Test all accessible outlets for proper wiring (polarity, ground)
- Light fixtures — Operation, proper bulb type, cover plates
- Smoke and CO detectors — Test all units. Check placement compliance. See our smoke detector inspection guide.
Note
In older condo buildings (pre-1980), it's common to find Federal Pacific, Zinsco, or Pushmatic panels — all of which have known safety concerns. The panel may be inside the unit or in a common utility closet. Document the panel brand and condition regardless of location.
4. Plumbing
Condo plumbing inspections focus on the fixtures and accessible supply/drain lines within the unit:
- Kitchen sink, faucet, and disposal — Operation, leaks, drain speed
- Bathroom sinks, faucets, tubs, and showers — Operation, leaks, drain speed, caulking condition
- Toilets — Flush operation, base seal, supply line condition
- Water heater (if in-unit) — Age, condition, TPR valve, drain pan, supply lines
- Visible supply lines — Under sinks, behind toilets. Look for corrosion, old gate valves, polybutylene piping
- Washing machine connections — Supply valves, drain, and overflow pan
Note: You're not inspecting the building's main supply or DWV stack. If you see evidence of issues (water stains on ceilings from above, slow drains suggesting building-wide problems), note them as observations.
5. HVAC System
HVAC in condos varies wildly depending on building type and age:
- In-unit furnace or heat pump — Evaluate like any residential system. Check our HVAC inspection checklist.
- Wall-mounted mini-split — Test heating and cooling modes, check for leaks at the line set, inspect the condensate drain
- PTAC unit (packaged terminal air conditioner) — Common in older condos and converted hotels. Test both heating and cooling.
- Baseboard electric or hydronic heat — Check operation, clearance from combustibles, thermostat function
- Central building HVAC — If the unit is served by a building-wide system, you may only be able to test the in-unit thermostat and air delivery. Note that the central system is outside your scope.
- Ventilation — Bath fans (test for function and adequate airflow), kitchen range hood (ducted vs recirculating), and any in-unit ERV/HRV
Key Takeaway
In high-rise condos, ventilation is a critical issue. Tight building envelopes and shared corridors can create pressure imbalances. If bath fans don't draw well, it may be a building-wide ventilation design issue — not something you can fix but worth noting.
6. Kitchen
- Appliances — Run the dishwasher, test the range/oven (both burners and oven temperature), microwave, disposal, range hood
- Countertops and cabinets — Condition, damage, moisture around sinks
- Backsplash and caulking — Gaps that allow moisture behind countertops
- Under-sink area — Leaks, moisture, mold, proper drain connections
7. Bathrooms
- Tile and grout — Cracked grout in showers and tub surrounds allows moisture into wall cavities. This is a major issue in condos where moisture damage can affect adjacent units.
- Caulking — Around tubs, showers, toilets, and sinks
- Ventilation — Bath fan operation and venting (should vent to exterior, not just into a shared chase)
- Shower pan/tub — Look for movement, soft spots around the base of tub/shower units
- Moisture stains — Ceiling, walls, floor — especially around shared walls with other units
Check our mold inspection guide for documentation protocols when you find moisture in shared-wall situations.
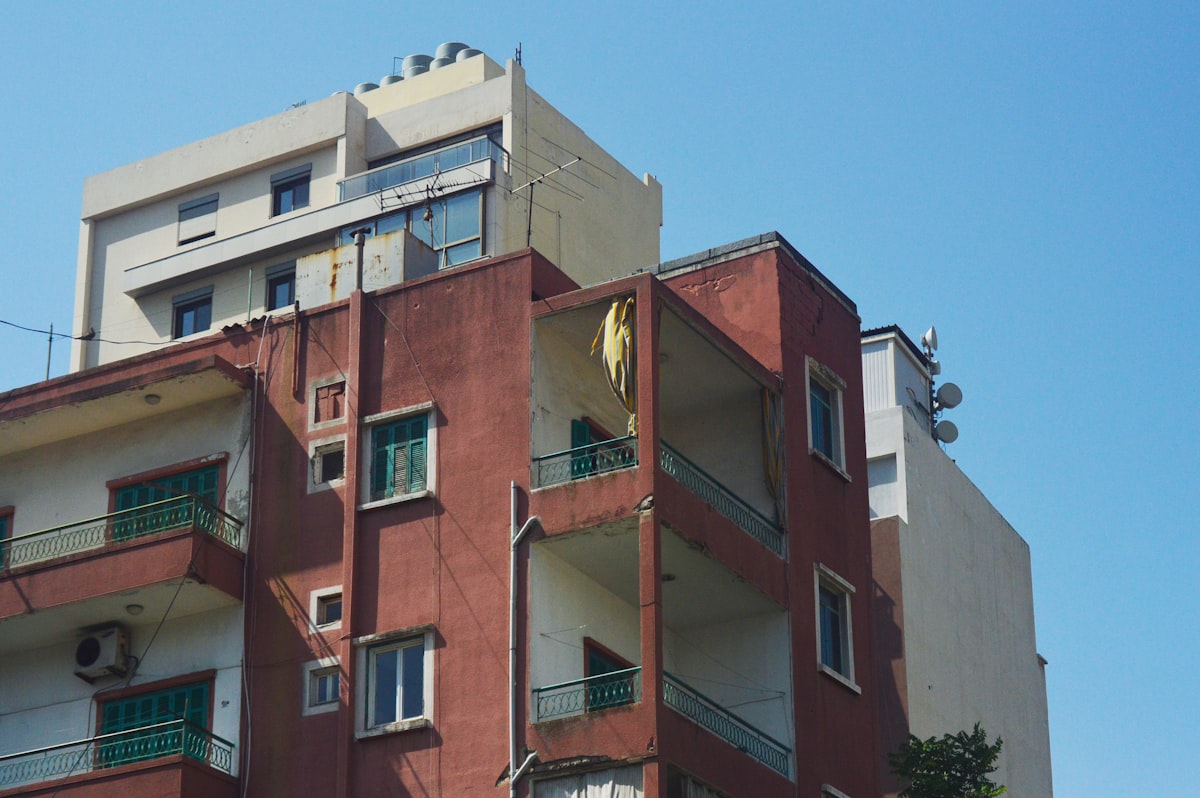
8. Balcony, Patio, and Deck
If the unit has a private outdoor space, inspect it carefully — these are frequent problem areas:
- Structural integrity — Check the deck surface, railings, and any visible support connections. Balcony collapses are a serious safety concern.
- Railing height and spacing — 36" minimum for residential (42" for commercial-style buildings), balusters spaced max 4" apart
- Waterproofing and drainage — Is the balcony surface sloped away from the building? Is the waterproof membrane visible and intact?
- Flashing at the building wall — This is where balconies leak most frequently
- Concrete spalling or rebar exposure — In concrete balconies, look for cracking, delamination, and rust staining indicating rebar corrosion
Note
After several high-profile balcony collapses in California and other states, inspectors should pay close attention to cantilevered balcony connections, especially on buildings older than 20 years. If you see concerning structural conditions, recommend evaluation by a structural engineer.
9. Interior Surfaces: Walls, Ceilings, Floors
- Walls — Cracks (especially at corners and around windows), water stains, bulging, nail pops
- Ceilings — Water stains from above (plumbing leaks from upper-floor units are common), cracks, sagging
- Floors — Level check, squeaking, damage, moisture around exterior walls and plumbing fixtures
- Shared walls — Listen for sound transmission issues (not a defect, but worth noting). Check for moisture stains or mold along shared walls.
10. Laundry Area
- In-unit washer/dryer — If present, check operation, dryer venting, supply connections
- Dryer vent — In condos, dryer vents often run long distances through shared chases. Verify that the vent terminates to the exterior. Long, convoluted dryer vent runs are fire hazards.
- Drain pan and overflow provisions — Especially important in upper-floor units where a washing machine leak can damage units below
11. Storage and Garage
- In-unit storage closets — Check for moisture, especially those against exterior or shared walls
- Assigned parking space — Not typically part of the inspection, but note accessible concerns (overhead clearance, structural cracks in the garage)
- Garage electrical — If the unit has a dedicated outlet or EV charger in the garage, check it
What's Typically Excluded from a Condo Inspection
Be clear in your report about what you did NOT inspect:
| Excluded Item | Reason |
|---|---|
| Roof | Common area — HOA responsibility |
| Building exterior/siding | Common area |
| Foundation | Common area and typically inaccessible |
| Elevators | Common area |
| Common hallways and stairwells | Not part of the unit |
| Building mechanical systems | Central boiler, fire suppression, etc. |
| Swimming pool, gym, lobby | Common amenities |
| Other units | Obviously |
| Concealed spaces behind finished walls | Non-destructive inspection |
The HOA Factor: What Buyers Should Know
While you're not responsible for evaluating the HOA, you can add significant value by guiding your client on what to investigate:
Reserve Study
Encourage buyers to request and review the HOA reserve study. This document outlines the expected lifespan and replacement cost of major building components (roof, siding, elevator, parking structure, plumbing, etc.). A well-funded reserve means the HOA is planning for major repairs. A poorly funded reserve means special assessments are coming.
HOA Documents to Review
- CC&Rs (Covenants, Conditions & Restrictions) — What's the owner responsible for vs. the association?
- Meeting minutes — Look for discussions about major repairs, deferred maintenance, or litigation
- Financial statements — Is the HOA solvent? What percentage of owners are delinquent on dues?
- Insurance master policy — What does the building's policy cover vs. what the individual owner needs to insure?
- Pending or recent litigation — Lawsuits against the HOA can indicate serious building defects
Key Takeaway
You're not a financial advisor and you're not reviewing HOA documents as part of your inspection. But mentioning to your client that these documents exist and are worth reviewing adds value and demonstrates expertise. It's the kind of thing that earns referrals from savvy real estate agents.
Moisture and Mold in Shared-Wall Condos
Shared walls are a unique risk factor in condos. Moisture issues in one unit can affect adjacent units, and tracking the source can be complicated:
- Water stains on shared walls — Could be from the neighboring unit's plumbing, not your client's
- Mold along shared walls — Often caused by condensation differences or plumbing leaks on the other side
- Bathroom moisture migrating through shared walls — Common when bath fans are inadequate or non-functional
Document what you see. Note that the source may be outside the unit being inspected. Recommend further investigation if moisture levels are elevated.
Limited Access Areas: How to Handle Them
Condos have more limited-access situations than single-family homes:
- No attic access — Middle and lower-floor units have no attic to inspect
- No crawl space access — Most condos are slab-on-grade or over parking structures
- Concealed plumbing — Main stacks and supply lines are behind walls and in common chases
- Locked mechanical rooms — Central HVAC, electrical, and plumbing rooms may be inaccessible
For each limited-access area, note it clearly in your report: "The area above the ceiling of this unit is inaccessible and was not inspected. Any concealed conditions are excluded from this inspection."
Reporting Condo Inspections
Condo inspection reports need extra clarity on scope. A few recommendations:
-
State the scope explicitly at the beginning of the report — "This inspection covers the individual condominium unit only. Building common areas, roof, exterior, and shared building systems are excluded."
-
Note all inaccessible areas — List every area you couldn't access and why
-
Distinguish between unit issues and building issues — If you see a crack in a load-bearing wall, that's a building issue worth noting, but frame it correctly: "A structural crack was observed at the west wall of the living room. This wall appears to be a building structural element. Recommend evaluation by a structural engineer and notification of the HOA."
-
Include HOA-relevant observations — Water stains from above, common area electrical or plumbing issues visible from the unit, balcony structural concerns
Using a voice-first reporting tool like ReportWalk streamlines condo inspections where you're moving quickly through a compact space. Dictate your findings room by room, and the app structures them into a clean report. Available on iOS — perfect for the fast-paced condo inspection workflow.
Condo vs. Single-Family: Quick Comparison
| Aspect | Single-Family | Condo |
|---|---|---|
| Roof inspection | Yes | No (common area) |
| Exterior evaluation | Yes | Limited (unit windows, doors, balcony) |
| Foundation | Yes | No (common area) |
| HVAC | Full system | In-unit components only |
| Plumbing | Full system | In-unit fixtures and accessible lines |
| Electrical | Full service panel | Unit sub-panel or dedicated panel |
| Attic | Yes (if accessible) | Rarely accessible |
| Crawl space | Yes (if accessible) | Rarely accessible |
| Landscaping/grading | Yes | No (common area) |
| Typical duration | 2.5–3.5 hours | 1.5–2.5 hours |
| Typical fee | $400–$600 | $250–$400 |
Final Thoughts
Condo inspections are a profitable niche that many inspectors overlook or avoid because the scope feels ambiguous. But once you dial in your process — clear scope agreements, systematic in-unit evaluation, proper documentation of exclusions and limitations — they become efficient, repeatable, and valuable.
In urban markets, condo-specialized inspectors stay booked because agents need someone who understands the difference between unit responsibility and HOA responsibility. That expertise earns trust, referrals, and repeat business.
Adjust your checklist, set expectations before you walk in the door, and document everything. That's how you handle condos like a pro.